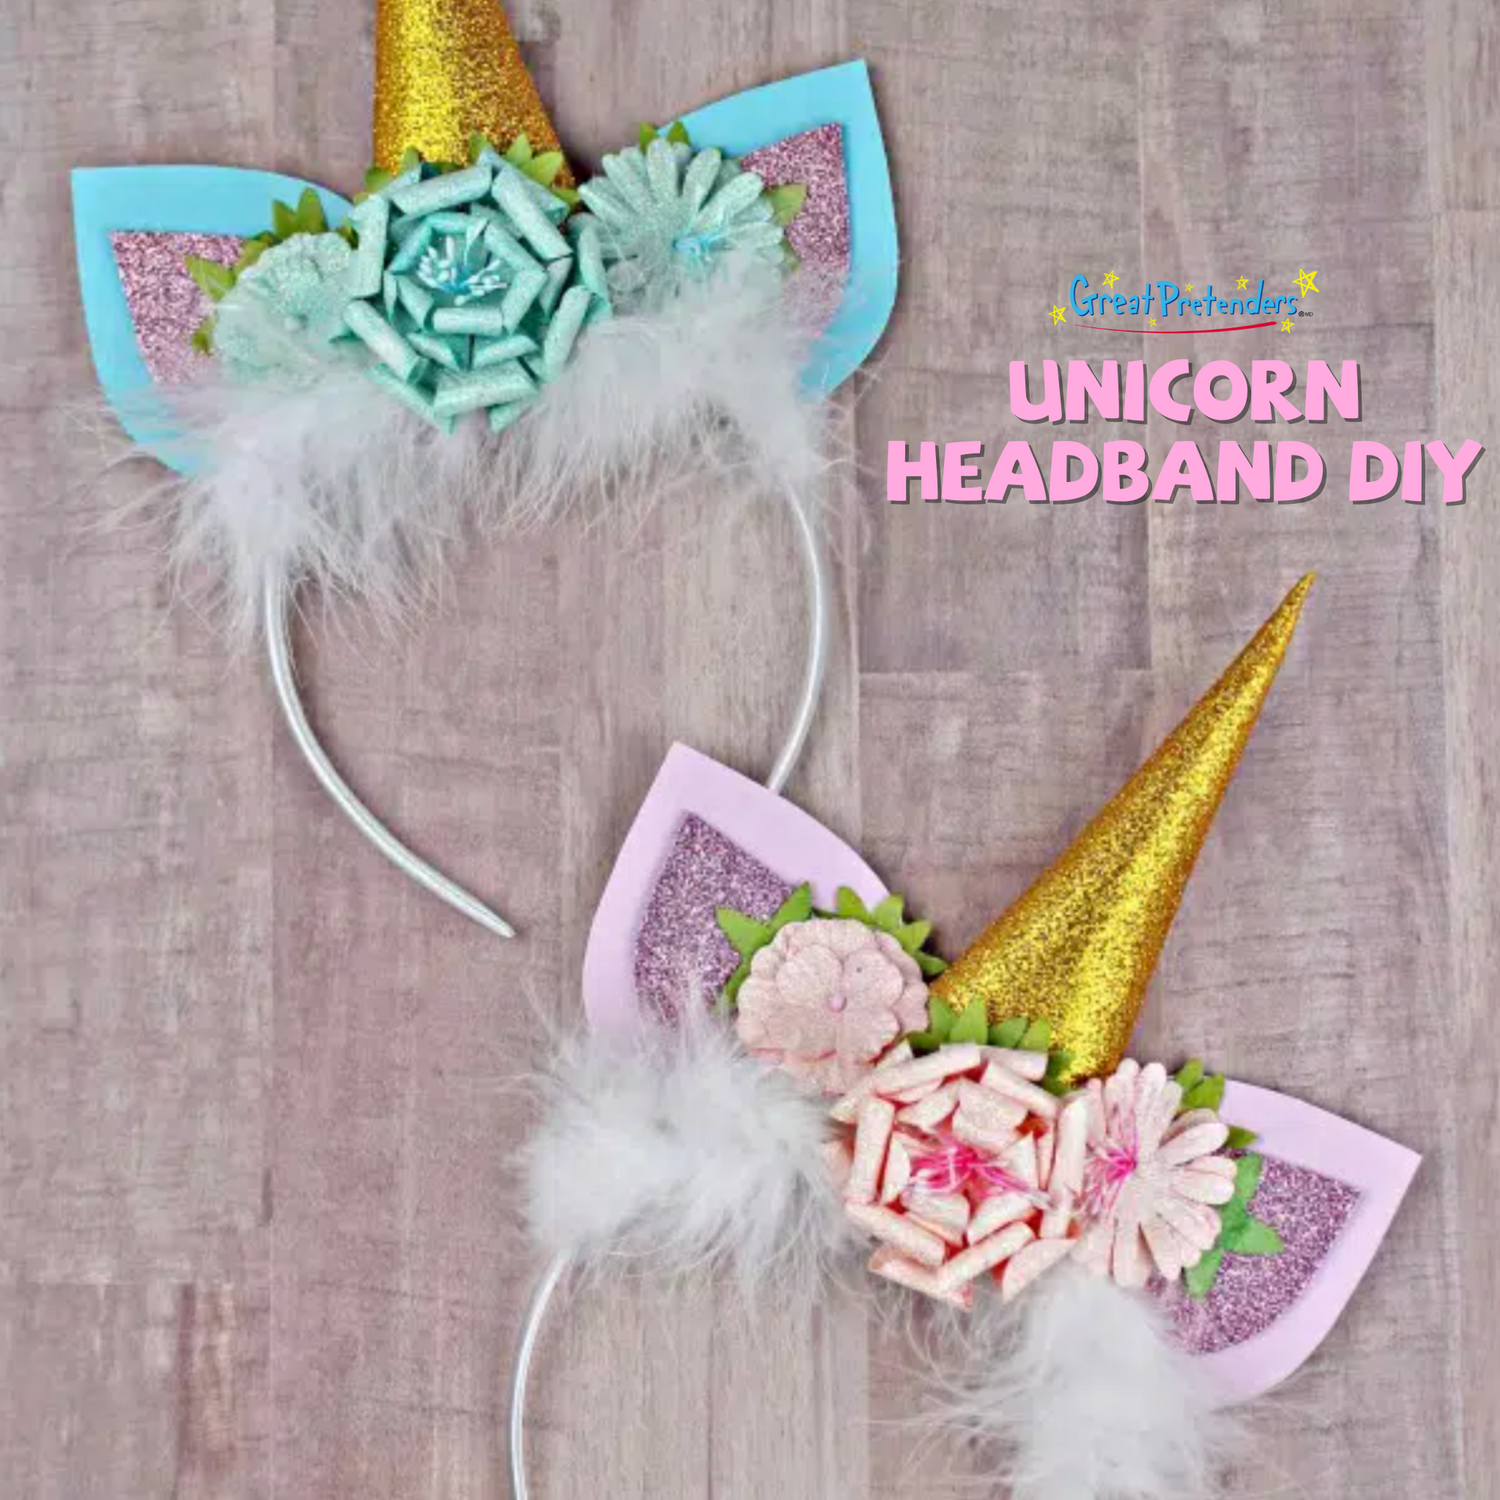
Calling all unicorn lovers - We have a DIY just for you!
Below you will find the list of materials you will need to create your very own unicorn headband! The best part about this begin a DIY craft is that it will be the perfect finishing touch to a costume that is customized to your child's imagination. Blue, pink, yellow- glitter, flowers or feathers- the choice is yours!

You will need:
- Headbands
- Scissors
- Hot Glue
- Gluestick
- Pencil
- Paper Flowers
- Cardstock
- Glitter Cardstock
- Marabou Feathers (or a feather boa)
- Unicorn Ears and Horn Template

Making your unicorn ears and horn:
- Print & cut out the template
- Trace the template onto any cardstock - use any colour of your choice!
- Cut the horn out and curl it into a cone shape. Use a bit of hot glue to secure the horn shape.
- Cut out the ears. You will need to cut out 2 of each size. Glue the smaller ear onto the larger ear. Try using different colours of cards tock for each sized ear. This will create a multi-dimensional look!
- Glue the horn onto the top of the headband using hot glue. You may need to flatten the base of the horn.
- Trim off the excess bit of the horn that hangs over the headband with scissors.
- Glue the ears onto both sides of the horn using hot glue.
- Glue a strip of marabou feathers across the front of the headband.
- Glue flowers across the front of the marabou feathers.
And there you have it! Your very own unicorn headband!

Not a DIY mom? Don’t worry! Check out our unicorn headband below!
This DIY is brought to you by www.redtedart.com

